
Why Beard Grooming Is More Than Just Trimming
A well-maintained beard involves two parallel commitments: managing the hair itself and caring for the skin underneath. Most grooming guides focus on shaping, but the skin under your beard is just as prone to dryness, buildup, and irritation as any other part of your face - and it's easier to neglect because it's hidden.
Understanding this from the start saves you from the most common early complaints: unbearable itching during the growth phase, visible flaking on the beard hair, and a beard that looks unkempt even when it's technically the right length. Good grooming habits address both layers simultaneously.
If you're just starting a broader grooming practice, the introduction to men's grooming routines is a useful companion to this guide.
What you will need
What You'll Need Before You Start
Before your first shaping session, gather the right tools. Attempting to shape a beard with the wrong equipment - a body trimmer with no guard options, kitchen scissors - leads to frustration and uneven results. The list below covers what's genuinely useful versus what's optional.
Adjustable beard trimmer
Maintains overall beard length and creates consistent, even lines across the beard.
Beard scissors
Used for precision trimming of stray hairs, mustache shaping, and detail work a trimmer can't reach.
Beard comb or boar-bristle brush
Detangles and trains beard hair, distributes product evenly, and reveals the true shape of your beard.
Beard oil
Moisturizes both beard hair and the skin underneath, reducing itch, dryness, and flaking.
Beard balm
Provides light hold and additional moisture, especially useful for longer or coarser beard textures.
Gentle facial cleanser
Cleans the beard and underlying skin without stripping natural oils or causing irritation.
Hand mirror or magnifying mirror
Allows you to check your neckline and cheek line from multiple angles for symmetry.
When it comes to beard oil specifically, the formulation matters less than consistent use. Most beard oils combine a carrier oil (such as jojoba or argan) with optional fragrance. If your skin tends toward sensitivity, fragrance-free formulas are worth seeking out. For more on how your skin type should influence your product choices, see our guide on skin type and routine building.
Step-by-Step: Shaping and Caring for Your Beard
Follow these steps in order for your first full grooming session. Once the routine is familiar, it takes fifteen to twenty minutes. The goal is to establish lines, manage length, and nourish the skin - not to achieve perfection on the first pass.
Wash and dry your beard first
Start every grooming session with a clean beard. Use a gentle facial cleanser or a dedicated beard wash to remove oil buildup, dead skin cells, and residue. Work the cleanser down to the skin - not just the surface hair - then rinse thoroughly with lukewarm water.
Pat dry gently with a clean towel. Avoid rubbing aggressively, which can cause frizz and irritate the skin beneath. Trim and shape only when your beard is fully dry; wet hair appears longer and can cause you to over-trim.
Comb through to reveal the natural shape
Before picking up any trimmer, comb or brush your beard in the direction of growth. This removes tangles, lifts flat hairs, and shows you the actual silhouette of your beard - including any uneven patches or stray hairs sticking out at odd angles.
Run a comb downward on the cheeks and outward from the chin. This step gives you an accurate picture of what you're working with and prevents the common mistake of trimming based on an unclear, tangled baseline.
Define your neckline
The neckline is the single most important line in beard shaping - and the most commonly misjudged. A neckline set too high creates a thin, short-looking beard. Set too low, and the beard appears shapeless.
A reliable guideline: place two fingers above your Adam's apple. That point - roughly where your head meets your neck - is generally where your neckline should sit. Use your trimmer without a guard to shave or fade everything below that line cleanly.
Work from the center outward on each side in a gentle curve that follows the natural jaw shape. Avoid a perfectly horizontal line - a slight arc looks more natural.
Shape your cheek line
Your cheek line is the upper border of your beard. Some people prefer a natural, soft cheek line; others prefer a clean, defined edge. Both are valid choices - the key is intentionality.
If you want a defined line, use your trimmer or a single-blade razor to remove stray hairs above the natural density of your beard on the cheek. Connect the cheek line smoothly to the mustache area and down to the sideburns. Aim for symmetry but accept that minor natural asymmetry is normal - use a hand mirror to check both sides.
Trim for length and evenness
With your borders defined, set your trimmer to your desired guard length and work across the beard in the direction of growth. Use slow, steady passes and resist the urge to go shorter than planned on the first pass.
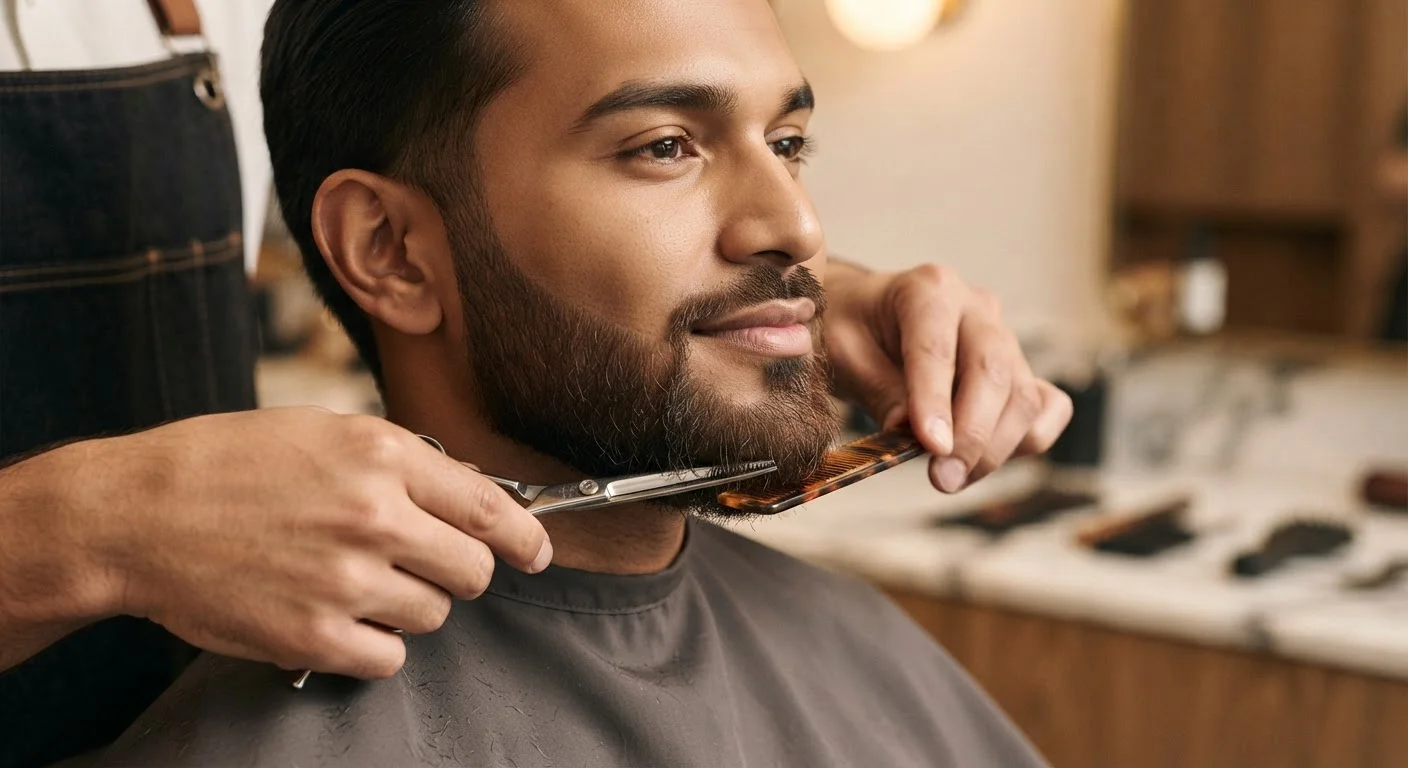
Switch to beard scissors for the mustache - trim hairs that overhang your upper lip using the lip edge as your guide. Comb the mustache downward first to see which hairs cross the line, then snip carefully with the tips of the scissors. For bulk trimming of longer beards, comb outward and trim above the comb.
Apply beard oil to hair and skin
Beard oil is a non-negotiable step for skin health under the beard. Dispense a few drops into your palm - the amount depends on beard length - rub your hands together, and work the oil into the beard with your fingertips, pressing down to the skin. Follow by combing through to distribute evenly.
Regular use reduces the itching and flaking that are common in early beard growth and keeps both hair and skin hydrated. For longer or coarser beards, a small amount of beard balm applied after oil can add light hold and additional conditioning.
Establish a weekly maintenance rhythm
Grooming isn't a one-time event. For most beard lengths, a full shaping session every one to two weeks keeps the beard looking intentional. Daily or every-other-day, spend 60 seconds combing through and applying a small amount of oil.
Watch for signs the skin underneath needs attention: persistent itching, redness, or visible flaking may indicate dryness or a sensitivity issue. Adjust your cleanser or moisturizing approach accordingly - the skin under a beard behaves similarly to the rest of your face and deserves the same consideration.
Skin Under the Beard Counts
Beard hair can mask dryness, clogged pores, and irritation until they become uncomfortable problems. Treat the skin underneath as an extension of your regular skincare routine - cleanse it, moisturize it, and check it regularly. Our skincare basics starting guide covers foundational skin care principles that apply directly to beard-covered skin.
Don't Rush the Growth Phase
Many people abandon beard grooming too early because the first few weeks of growth look uneven or patchy. Beard density and distribution vary significantly from person to person and are largely genetic. Give your beard at least four to six weeks before making major shaping decisions - what looks patchy at week two often fills in considerably by week five.
Common Missteps and How to Avoid Them
Even with the right tools and intentions, a few recurring mistakes can undermine results. Here's what to watch for:
- Setting the neckline too high. This is the most common beginner error and the hardest to fix quickly. When in doubt, leave the neckline lower and adjust upward gradually over multiple sessions.
- Skipping the cleansing step. Trimming over a dirty beard leads to clogged trimmer blades and a less accurate result. Always start clean.
- Over-trimming from anxiety. A slightly long beard is far more recoverable than one that's been cut too short on one side. Take your time, especially around the neckline and cheek line.
- Ignoring the mustache. The mustache is the most visible part of the beard and also the most frequently neglected in shaping sessions. Trim it every session - even a small cleanup makes a significant difference in overall appearance.
For a broader look at building consistent grooming habits across hair types, the grooming checklist for all hair textures provides a useful reference framework.
Persistent Skin Issues Need Professional Attention
If you experience ongoing redness, severe itching, painful bumps, or signs of ingrown hairs that don't resolve with gentle cleansing, consult a dermatologist. These symptoms can indicate folliculitis, contact dermatitis, or other conditions that require professional evaluation. General grooming advice is not a substitute for medical care.
This article is for general informational purposes only and is not a substitute for advice from a qualified dermatologist or healthcare professional. If you have persistent skin concerns, consult a professional.